Achieving a flawless, enduring finish is not just about choosing the right color; it’s equally about meticulously preparing the exterior wall. Proper preparation is the linchpin that ensures your paint adheres well and looks impeccable over time. Here, we’ll outline seven simple yet indispensable steps on “how to prepare an exterior wall for painting” to make prepping your exterior walls a breeze.
List Of Tools You Need
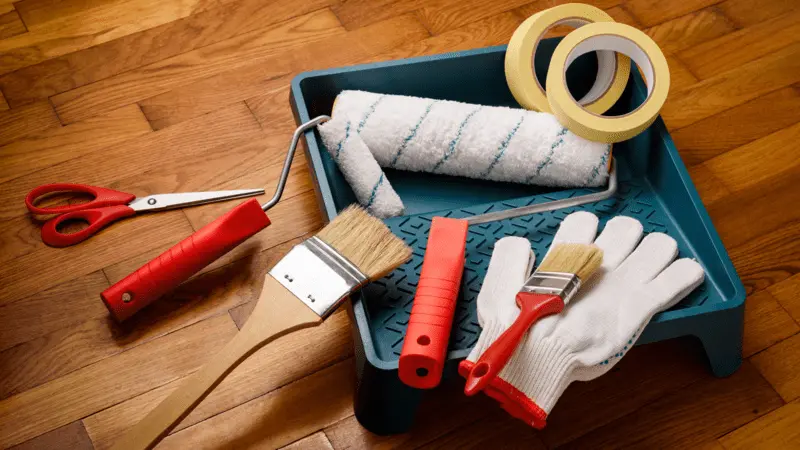
Preparing an exterior wall for painting is crucial to ensure a smooth and long-lasting paint finish. Here’s a list of tools and materials you’ll need for this process:
Safety Gear:
- Safety goggles or glasses
- Respirator or dust mask
- Gloves
Cleaning and Surface Preparation:
- Power washer or hose with a spray nozzle
- Scrub brushes or brooms
- Mild detergent or a specialized exterior cleaner
- Bucket for mixing cleaning solution
- Ladder or scaffolding for reaching higher areas
- Drop cloths or plastic sheets to protect surrounding areas
Scraping and Removing Loose Paint:
- Paint scrapers (handheld or pole-mounted)
- Wire brush
- Putty knife
Sanding:
- Electric or hand sanders
- Sandpaper (medium and fine grits)
Repairing Surface Imperfections:
- Spackle or joint compound for filling holes and cracks
- Caulk gun and exterior caulk for sealing gaps and joints
- Wood putty for repairing wood surfaces
- Exterior patching compound for larger holes or damaged areas
Priming:
- Exterior primer appropriate for the wall material (wood, stucco, concrete, etc.)
- Paintbrushes or rollers suitable for primer application
Masking and Taping:
- Painter’s tape for masking off areas you don’t want to paint (e.g., windows, trim)
- Plastic or drop cloths to cover plants, fixtures, or other elements you want to protect
Painting:
- Exterior paint in the desired color and finish
- Paintbrushes, rollers, and roller covers suitable for exterior use
- Paint trays or buckets for holding paint
- Extension poles for rollers (helpful for reaching higher areas)
Cleanup:
- Paint thinner or appropriate solvent for cleaning paint brushes and equipment
- Rags or paper towels for wiping and cleaning up
Inspecting the Wall:
- Flashlight for examining the wall surface closely for any remaining imperfections or areas that need further attention
Repairing Exterior Elements:
- Depending on the condition of the exterior, you may need additional tools or materials for repairing or replacing elements such as siding, trim, or window frames.
How To Prepare An Exterior Wall For Painting?
Here are the detailed explanations of each step in preparing an exterior wall for painting.
Step-1: Clear The Area And Wash The Walls
The first step in preparing an exterior wall for painting is to ensure a clean and unobstructed workspace. Remove any plants, garden hoses, or other items from the area around the exterior walls. This provides you with ample space to work efficiently.
Next, thoroughly clean the walls using a suitable cleaning solution, such as Sugar Soap and a sponge. Follow the instructions on the packaging to prepare the cleaning solution. Use the sponge to scrub the walls and remove accumulated dirt, grime, or other contaminants. Cleaning the walls ensures that the paint will adhere properly, resulting in a smoother finish.
After cleaning:
- Rinse the walls with water using a power washer or a hose with a spray nozzle.
- Ensure that all the soap residue and dirt are completely removed.
- Allow the walls to dry thoroughly before moving on to the next step.
This drying process is crucial, as painting on damp walls can lead to uneven drying and paint adhesion issues.
Step-2: Addressing Mold And Mildew
Mold and mildew can be persistent problems on exterior walls, especially in damp or shaded areas. To tackle this issue:
- Prepare a bleach solution by mixing one cup with three cups of water or as specified on the bleach bottle.
- Wear appropriate personal protective equipment (PPE) and sponge the bleach solution over the affected areas of the walls.
- Allow it to sit for about 15 minutes to eliminate mold and mildew effectively.
- Rinse the walls thoroughly with water and allow them to air dry completely.
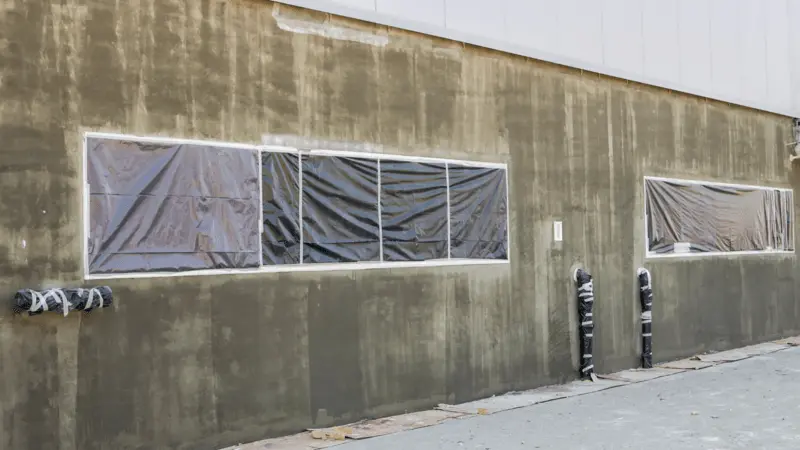
Step-3: Protecting Surrounding Areas
Protect the surrounding areas and vegetation from any paint, cleaning agents, or other materials used during preparation. Cover the grass, plants, and nearby fixtures with plastic or canvas drop cloths. This protective covering will ensure no accidental damage during the preparation and painting phases.
Step-4: Inspecting And Repairing Wall Surfaces
Carefully inspect the exterior wall surfaces for imperfections, cracks, holes, or other irregularities. Remove any loose or peeling paint by scraping and sanding the affected areas. Use appropriate tools such as paint scrapers, wire brushes, and sandpaper.
Fill any holes, dings, or gaps in the walls using a suitable exterior-grade filler. Use filling blades to apply the filler evenly and create a smooth surface. Opt for acrylic gap sealants for cracks and gaps, particularly around doors and windows. Ensure the fillers and sealants cure correctly before moving on to the next step.
After the fillers and sealants have cured, carefully sand the repaired areas to create a smooth and uniform surface. Sanding is essential to provide an even texture for the primer and paint to adhere to, resulting in a professional-looking finish.
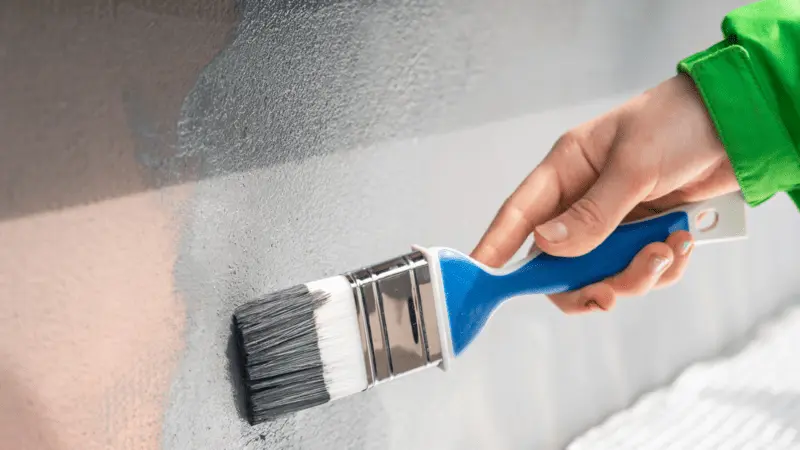
Step-5: Applying Primer To Prepared Areas
Applying a suitable primer is a crucial step in the preparation process. Use a high-quality primer such as WeatherTough® spot primer for the areas that have been repaired and sanded. The primer ensures better adhesion of the paint and provides a consistent base for the final paint application. Allow the primer to dry thoroughly before moving on to the next steps.
Step-6: Final Preparations For Paint Application
Before painting:
- Conduct a final inspection of the prepared wall surfaces.
- Check for any remaining imperfections, rough spots, or areas that may need further attention.
- Address these issues by adding sanding or filling to ensure a flawless surface.
Additionally, carefully mask any areas that need protection during the painting process. Use painter’s masking tape to cover fixtures like window frames, door frames, and other elements that cannot be removed. This step ensures clean and precise edges while painting.
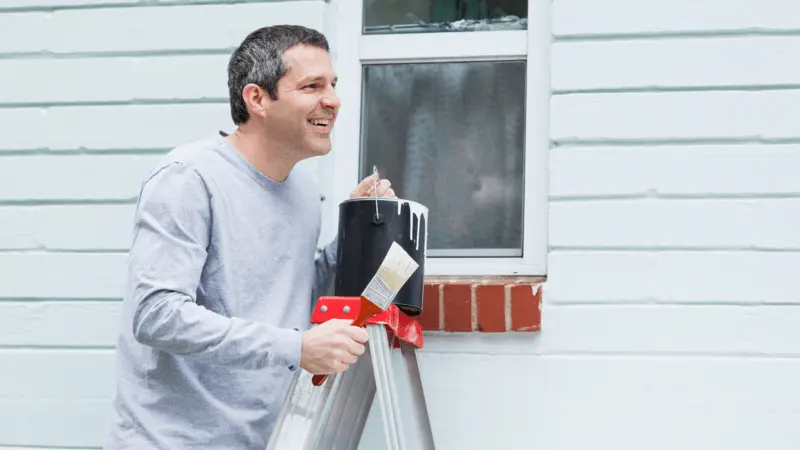
Step-7: Readiness For Painting
The exterior surface is now ready for painting, with the walls thoroughly cleaned, repaired, primed, and all necessary preparations completed. The surface is smooth and free of imperfections, and the masked areas are secure. You can confidently apply the desired paint for a stunning, long-lasting exterior finish.
How Long Should I Wait After Priming Before I Start Painting?
Before you start painting, the waiting time after priming can vary depending on the primer you use and the manufacturer’s instructions. However, a general guideline is to wait for the primer to dry completely before applying the paint.
Most primers will dry to the touch within 1-2 hours, but it’s crucial to allow sufficient time for the primer to cure and create a solid base for the paint. For optimal results and adherence to the paint, it’s recommended to wait at least 24 hours before painting over the primed surface.
Always refer to the specific instructions and recommendations provided by the primer manufacturer. The product label or accompanying documentation outlines the recommended drying and curing times. Following these guidelines will ensure your paint job’s best adhesion and durability.
Importance Of Preparing Your Exterior Before Paints
Preparing your exterior before painting is a pivotal step that significantly impacts the outcome and longevity of your paint job. This crucial process lays the foundation for a beautiful, durable, well-finished paint job. Here’s why it’s so vital:
- Enhanced Durability: Properly preparing the exterior surface ensures the paint adheres effectively. This adherence increases durability, meaning your paint will last longer without chipping, peeling, or fading. It protects your investment and reduces the need for frequent repaints.
- Smooth and Attractive Finish: Preparing the surface by cleaning, smoothing, and filling imperfections results in a smoother canvas for your paint. A smooth surface allows the paint to be applied evenly, providing a more attractive and professional finish.
- Improved Adhesion: Cleaning and treating the exterior surface ensures the paint adheres firmly, preventing it from blistering or peeling. This improved adhesion is essential, especially in varying weather conditions, ensuring the paint withstands the elements effectively.
- Even Color and Texture: Proper preparation helps achieve an even color and texture across the surface. Uneven surfaces can cause the paint to appear blotchy or uneven, affecting the overall aesthetic of your property.
- Cost-Effectiveness: While it might seem like an additional step, investing time and effort in preparation can save you money in the long run. Well-prepared surfaces require fewer paint and touch-ups, reducing paint usage and expenses.
- Prevention of Future Damage: Addressing existing issues like cracks, holes, or mold during the preparation stage prevents them from worsening. By tackling these problems early on, you ensure a longer lifespan for your paintwork and avoid more extensive repairs.
Frequently Asked Questions
1. Is It Necessary To Wash The Exterior Walls Before Painting?
Yes, washing the exterior walls is essential. Cleaning removes dirt, grime, and other contaminants hindering paint adhesion. A clean surface allows the paint to adhere better and ensures a more durable finish.
2. Can I Paint Over Flaking Or Peeling Paint On The Exterior Walls?
It’s not recommended. Flaking or peeling paint indicates an unstable surface. Remove the loose paint, sand the area, and apply a primer before painting to achieve a smooth and long-lasting finish.
3. Why Is Primer Essential When Painting Exterior Walls?
Primer provides a robust and uniform base for the paint to adhere to, enhancing its durability and finish. It also helps seal porous surfaces, prevents stains, and ensures better coverage of the final paint.
4. How Do I Fill Cracks And Holes In The Exterior Walls Before Painting?
Use an exterior-grade filler to fill cracks and holes. Apply it with a filling blade, smooth the surface, and let it cure. Afterward, sand the filled areas for a seamless, even surface before priming and painting.
5. What Precautions Should I Take When Using Bleach To Remove Mold On Exterior Walls?
Safety is paramount. Wear appropriate personal protective equipment (PPE), follow the recommended dilution ratio for the bleach solution, and ensure proper ventilation. Rinse the walls thoroughly after using bleach to prevent any adverse effects on the paint or surface.
Do You Need Any Exterior Painting Solutions? Inexmax Is Here To Help!
Are you seeking top-notch exterior painting solutions? Your answer lies with InexMax, based in Brisbane, Queensland. With a decade-long legacy, InexMax has reshaped the painting landscape, delivering unparalleled quality and customer satisfaction. Our approach is rooted in integrity, innovation, and an unwavering quest for perfection in every paint stroke. Let InexMax redefine your exterior aesthetics, showcasing a blend of expertise and artistic precision. Discover the transformative power of paint with InexMax, where excellence meets the brush.